This article covers how to use the command 'Git Stash'.
You may find yourself in a situation where you want to save your current changes, but don't want to commit them yet. For instance, you may have made changes on one branch, but realised you should have been on another.
No problem, you can just checkout the other branch, right? Well not quite. You might get the following result:
slloy@LAPTOP-TJ7H4P4G MINGW64 /d/Code/sean-lloyd.com (master)
$ git checkout masonry_test
error: Your local changes to the following files would be overwritten by checkout:        src/pages/Index.vuePlease commit your changes or stash them before you switch branches.Aborting
In this instance, switching branches would result in a merge conflict with your currently tracked changes.
Fortunately, you can stash your changes away:
git stashThis command will remove tracked files, and stores them locally so you can reapply them later.
Note that this will only work on files that are tracked! Untracked files will not be stashed.
Let's have a look at an example:
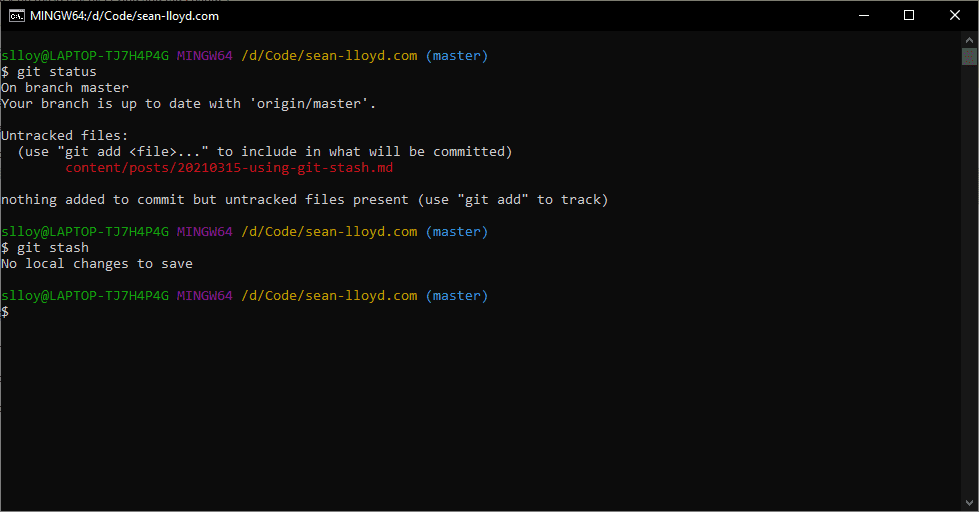
By calling git status, we can see that there is a single untracked file in our workspace. When we call git stash afterwards, git informs us that there are no local changes to save!
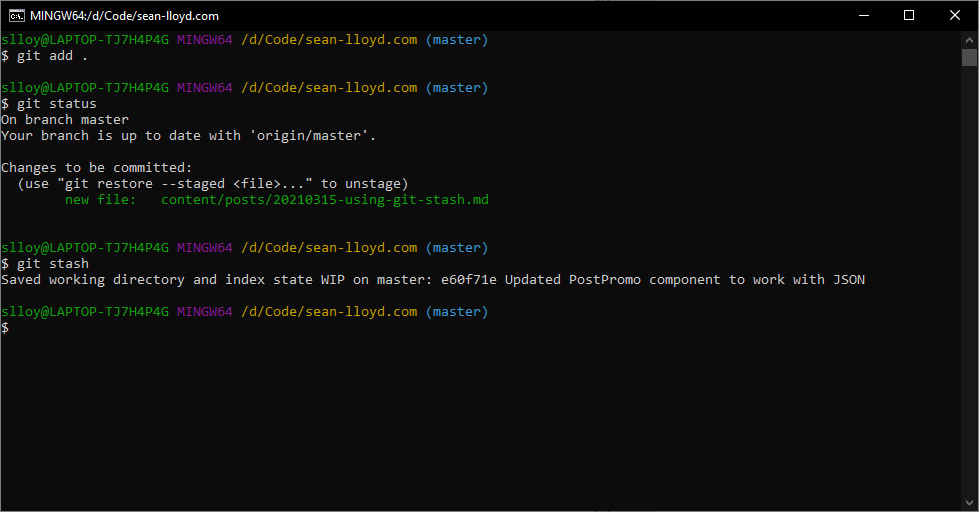
Once we track them (using git add), they can be stashed correctly:
When using git stash, it's good to provide a name, so it's easier to find later:
git stash save "My stash name"Unlike the previous example, we need to use the save parameter when providing a name. This is because save is implicitly applied when you create a stash without a name.
If you don't provide a name, git will get the name for the stash from the last commit message, on your current branch.
If you want to see your stashes, you can use git stash list:
git stash listslloy@LAPTOP-TJ7H4P4G MINGW64 /d/Code/sean-lloyd.com (master)
$ git stash list
stash@{0}: On master: My stash name
stash@{1}: WIP on master: 571e42f Another stash
stash@{2}: On DifferentBranch: Third stashUsing this list, you can select and apply the stash you want to apply. For example:
git stash apply stash@{0}You can also see the changes within a stash (although not in great detail), by using show:
git stash show stash@{0}slloy@LAPTOP-TJ7H4P4G MINGW64 /d/Code/sean-lloyd.com (master)
$ git stash show stash@{0}
src/components/Index.vue | 3 +++
src/data.json | 12 ++++++++++++
2 files changed, 15 insertions(+)Another useful parameter is pop. This will apply the last saved stash, and delete it.
We might use this when we want to stash changes quickly before changing branches:
git stash popOr, if you just want to delete the stash, you can use drop:
git stash dropFinally, if you want to remove all of your stashes, and you are absolutely sure you don't need any of them, you can use clear:
git stash clear